GOTW | Xero Tip: Credit Notes for Sales
"Create a credit note in Xero if you need to reduce the amount of an invoice. You could have several reasons for needing to add a credit note such as damaged goods, or a cancellation in the sales agreement. "
In Xero you can create a create note from:
- An awaiting payment invoice
- Sales dashboard
- A contact’s details
- Copied from an existing credit note
Once you have created and saved your credit note, you’ll see it appear in any sales reports you run. You can then allocate your credit note to an existing invoice to reduce the amount outstanding or apply a cash refund.
Common reasons for creating a credit note and how to do so in Xero:
-
You issued an invoice and the customer noticed a mistake before paying
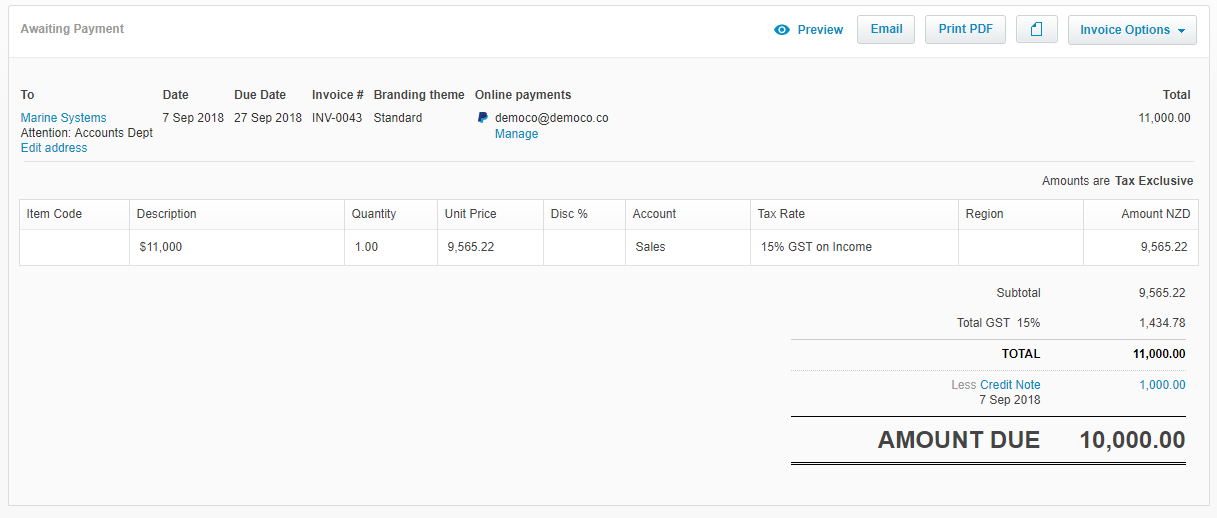
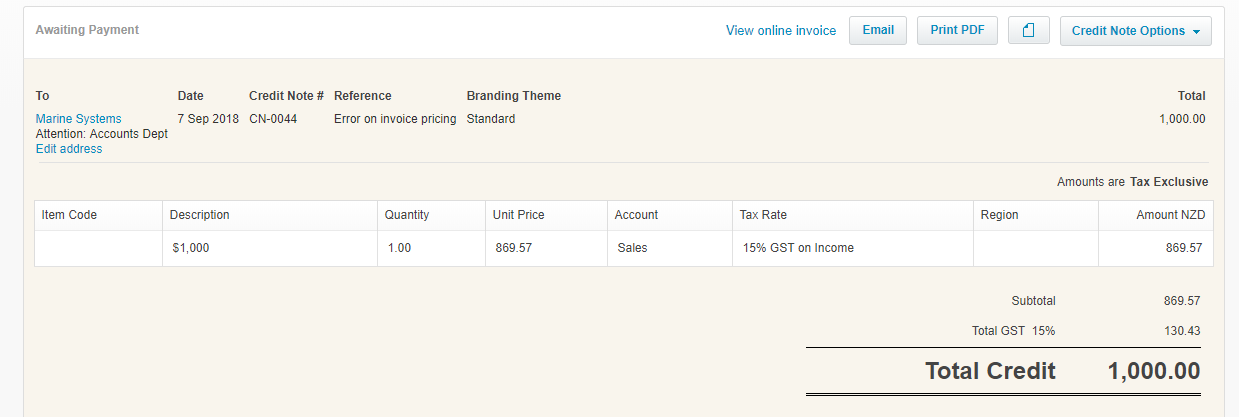
In this case, the customer hasn’t paid the original invoice amount yet as they have noticed the mistake. For example, you raised an invoice for $11,000, but it was supposed to be for $10,000. You would need to raise a credit note for the difference of $1,000.
Solution: Add a credit note to the sales invoice
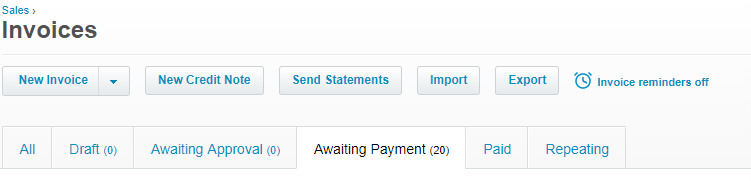
1. In the Accounts menu, select Sales
2. Click the Awaiting Payment tab
3. Find and open the invoice that you want to credit
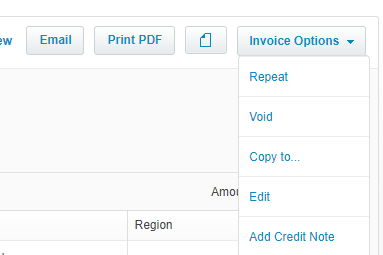
4. Under Invoice Options, select Add Credit Note +
5. Confirm the credit note details and edit any necessary fields
a. To – if you enter a new customer, they’re added to Xero as a contact
b. Date – will default to today’s date
c. Reference – Enter details of the invoice being credited or add this into the Description field (both fields are optional)
d. Add or edit more items. You can drag and drop the item lines to reorder them. (optional)
e. Click Approve to approve the credit note and automatically allocate the credit to the invoice
f. Or click Save to allocate the credit later

-
You issued an invoice; the customer paid and then returned some or all the goods
As the invoice has been fully paid, you will not be able to apply a credit note against the original invoice, so the credit note will remain as awaiting payment to either use against future invoices or you can make a cash refund to the customer. If you choose to use the credit against future invoices, you will be prompted to apply this credit note against the next invoice you raise for this customer.
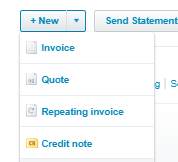
Solution 1: Add a credit note from the Sales dashboard
1. In the Accounts menu, select Sales
2. Select the arrow next to New to five you more options
3. Select Credit note
4. Enter the credit note details, IMPORTANT, ensure the exact customer name is selected in the To field to enable you to be able to allocate this credit note against future invoices raised to this customer
5. Enter a date
6. Enter a description i.e. over payment of invoice number xx
7. The account code will match the original invoice e, g. Sales
8. Enter the dollar value for the credit note
9. Select Approve
10. This credit note will show in the Awaiting payment section of the sales dashboard ready to be refunded to your customer or to apply to future invoices
Solution 2: Apply credit note from Solution 1 to a future invoice
1. When raising an invoice to the same customer in the future you will be prompted to apply any outstanding credits against the invoice
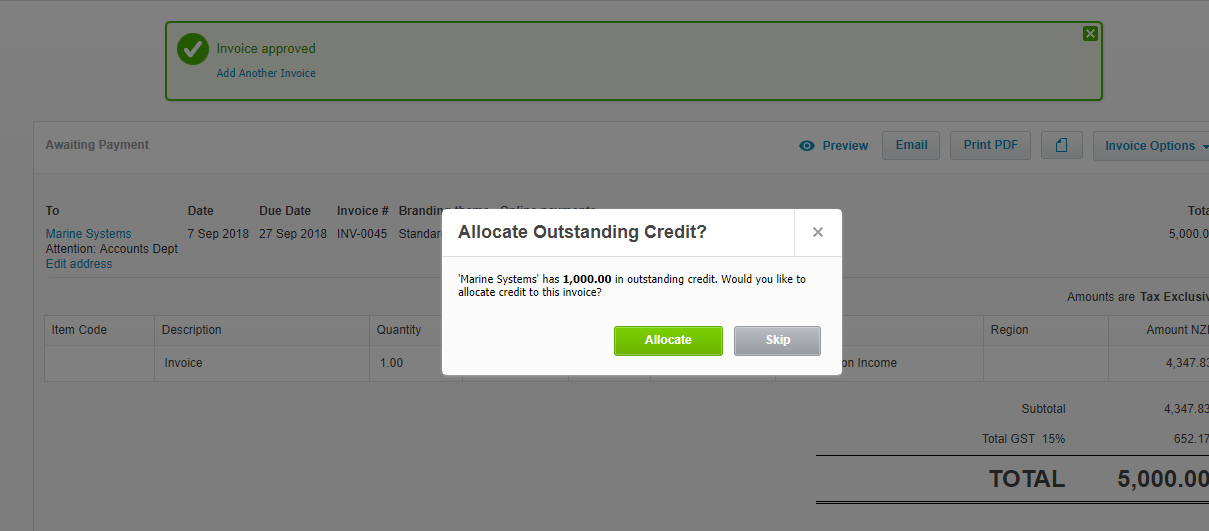
2. If you wish to allocate the credit note, select Allocate
3. The Allocate Credit to Invoice screen appears
4. Here you have the option to apply the full credit note against the invoice or only partially. If you had multiple credit notes, they each can be applied against this new invoice
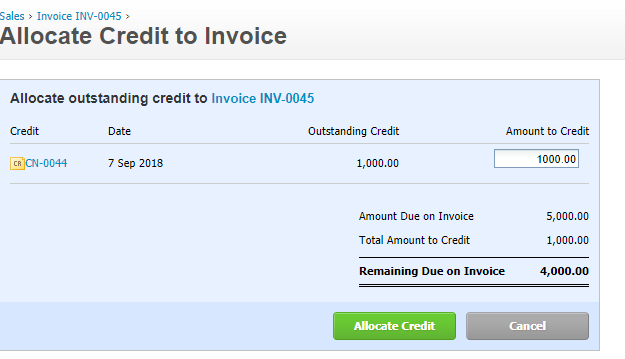
5. Select Allocate Credit
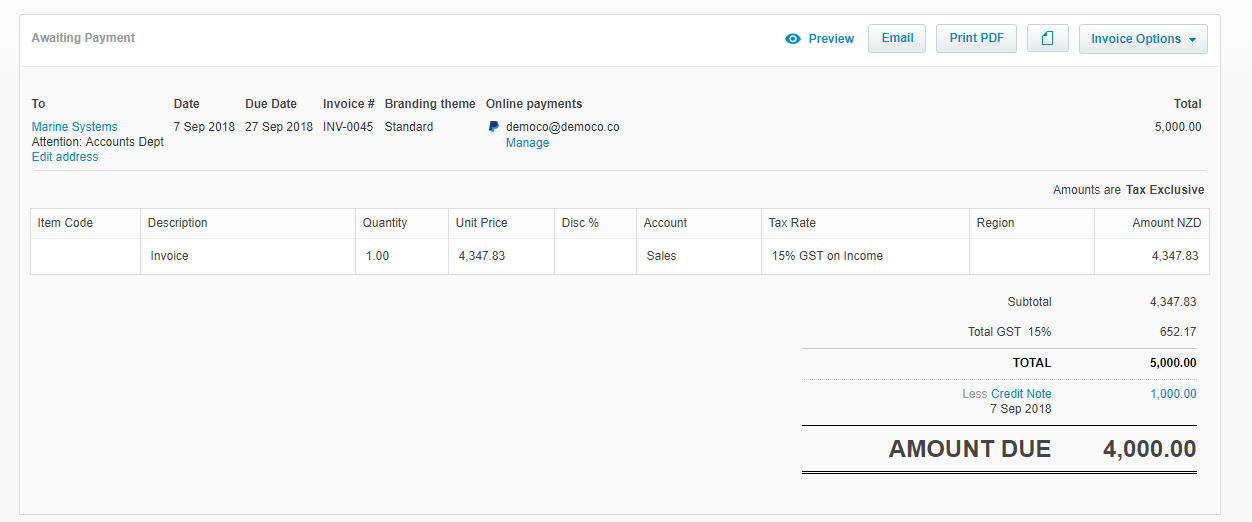
6. The credit has been applied to the invoice, it will appear against the invoice with the remaining balance showing ready to be sent to your customer
Solution 3: Send a cash refund of the credit note from Solution 1 to your customer
1. Open the credit note from the Awaiting payment section of the sales dashboard
2. Down the bottom of the page is the Make a cash refund area
3. Enter the dollar value of the credit note
4. Enter the date that the credit note will be paid to the customer
5. Select the bank account that the credit note will be paid from IMPORTANT this is so it will match the bank line that shows to be reconciled on the bank statement
6. Enter a reference
7. Select Add Refund

8. From your bank account, make the cash refund to your customer and then reconcile when it shows as a bank line in Xero (it will go green as an automatic match)
-
You issued an invoice and your customer has overpaid you
In this case, you have not reduced what your customer owes; your customer has simply overpaid leaving their account in credit. You can either leave the overpayment against their account to apply against future invoices or refund them the overpayment.
Solution: Reconcile the bank line to show as an overpayment and then allocate to a new invoice or existing invoice or make a cash refund
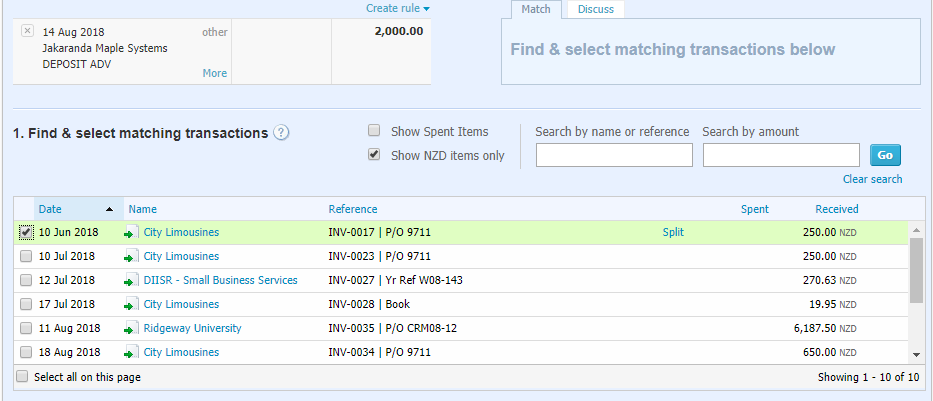
1. In the Reconcile tab, find the statement line that includes the overpayment of an invoice
2. Click Find & Match

3. Find the invoice and select the checkbox next to it
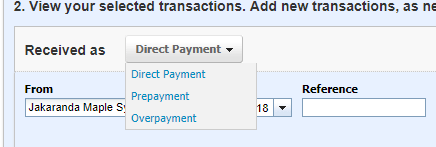
4. Click New Transaction, then select Receive Money

5. Next to Received as, click Direct Payment, then select Overpayment
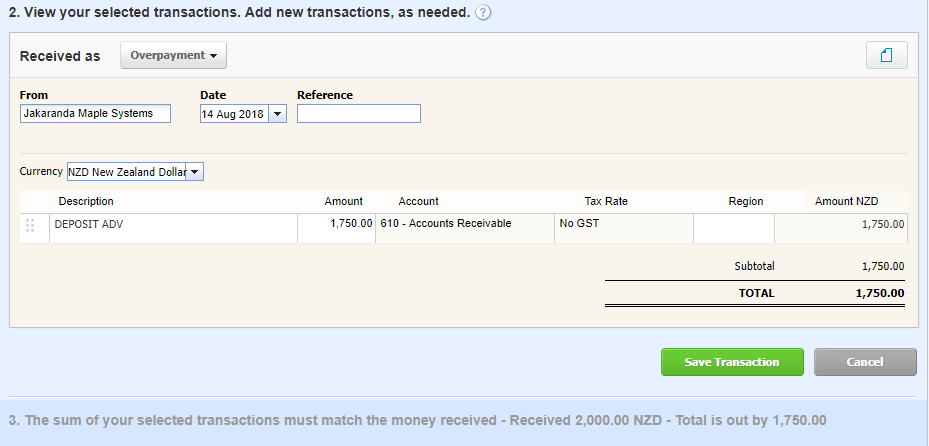
6. Enter the details of the overpayment. You cannot change the Account or Tax Rate fields
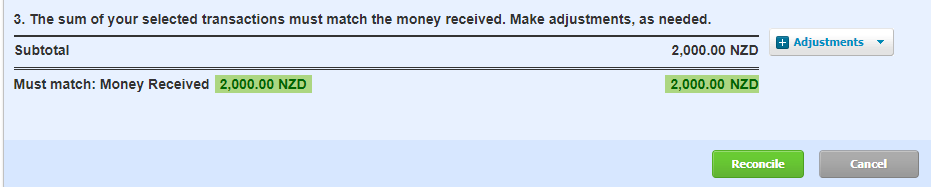
7. Click Save Transaction
8. Click Reconcile
9. You can then apply this overpayment to an existing invoice for this customer, or against future invoices raise
a. Apply the overpayment to an existing invoice
i. In the Accounts menu, select Sales
ii. Click Awaiting Payment
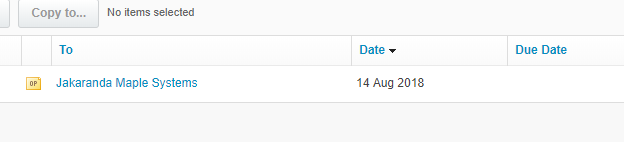
iii. Select the overpayment

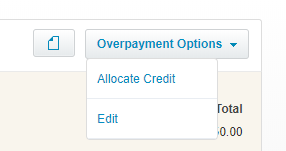
iv. Click Overpayment Options, select Allocate Credit (note this will only appear if the invoice To field exactly matches the To field of the overpayment)
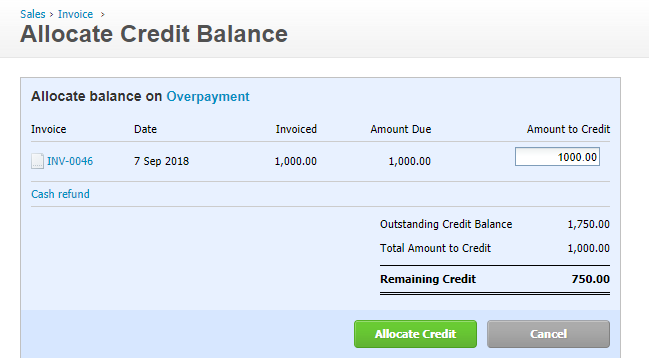
v. This will display all unpaid invoices for this customer. Enter the amount to credit each invoice

vi. Enter the amount to apply as a credit on the invoice
vii. Click Allocate Credit
c. Refund a sales overpayment
i. In the Accounts menu, select Sales
ii. Click Awaiting Payment
iii. Select the overpayment
iv. Scroll down to Make a cash refund and complete the payment fields
v. Click Add refund

If you require any further assistance….
Please contact our in-house tech hub expert, Kate.
http://www.bwr.co.nz/contact-us#itdept
06 873 8037