GOTW | MYOB Essentials: Customising Invoices to reflect your business!
"MYOB Essentials has a super easy feature where you can customise your invoices that you send to customers so that it matches your business brand and look."
MYOB Essentials has a super easy feature where you can customise your invoices that you send to customers so that it matches your business brand and look.
You can customise the appearance of your invoices and quotes by choosing a pre-designed template, adding your business logo and selecting the colours you want to use. The appearance you choose will automatically be used for all invoices and quotes that you print or email to your customers. The appearance can be changed at any time.
While customising your invoices you can also add in the payment terms, default email messages and how to pay options. Some of the settings such as your business logo and payment details will also flow through to show on your customer statements as well.
These few simple steps will have your invoices looking professional and reflecting your business in no time!
Step 1: Add your business logo
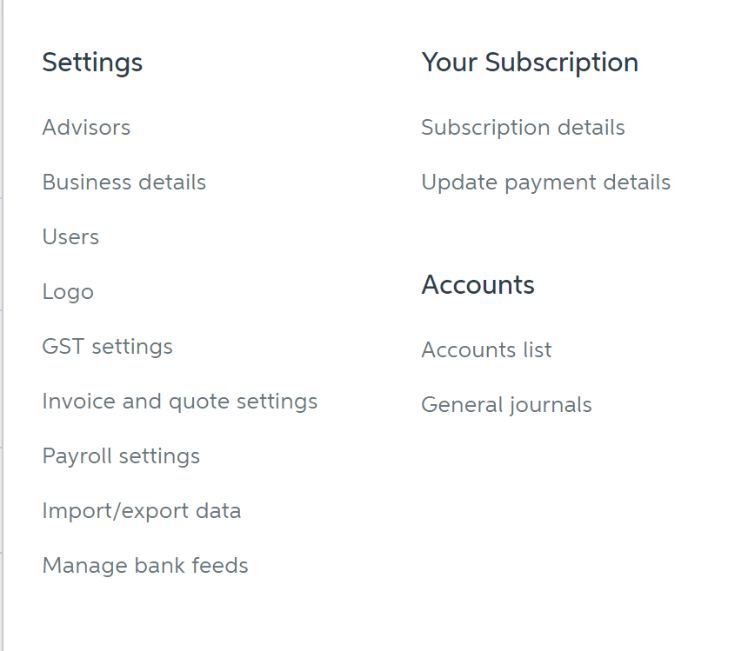
- In your MYOB Essentials file open the Logo page. This is found by clicking your business name at the top right-hand side of the page
2. The File Upload window appears
3. Navigate to where you have saved your logo on your computer and click Open
4. Your logo will now appear on your MYOB Essentials quotes and invoices
Geek Tip 1:
The graphic that you upload for your logo image must be:
- either a .jpg, .gif, .png or .bmp file, and
- less than 1MB in size
To ensure your company logo is best reproduced on your MYOB Essentials documents, it’s recommended that the graphic you upload:
- has a white background, and
- is at least 250 pixels wide by 130 pixels high
Customise invoice:
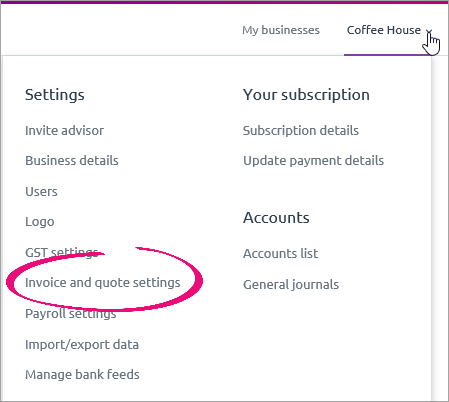
- In your MYOB Essentials file open the Invoice and quote settings page. This is found by clicking your business name at the top right-hand side of the page
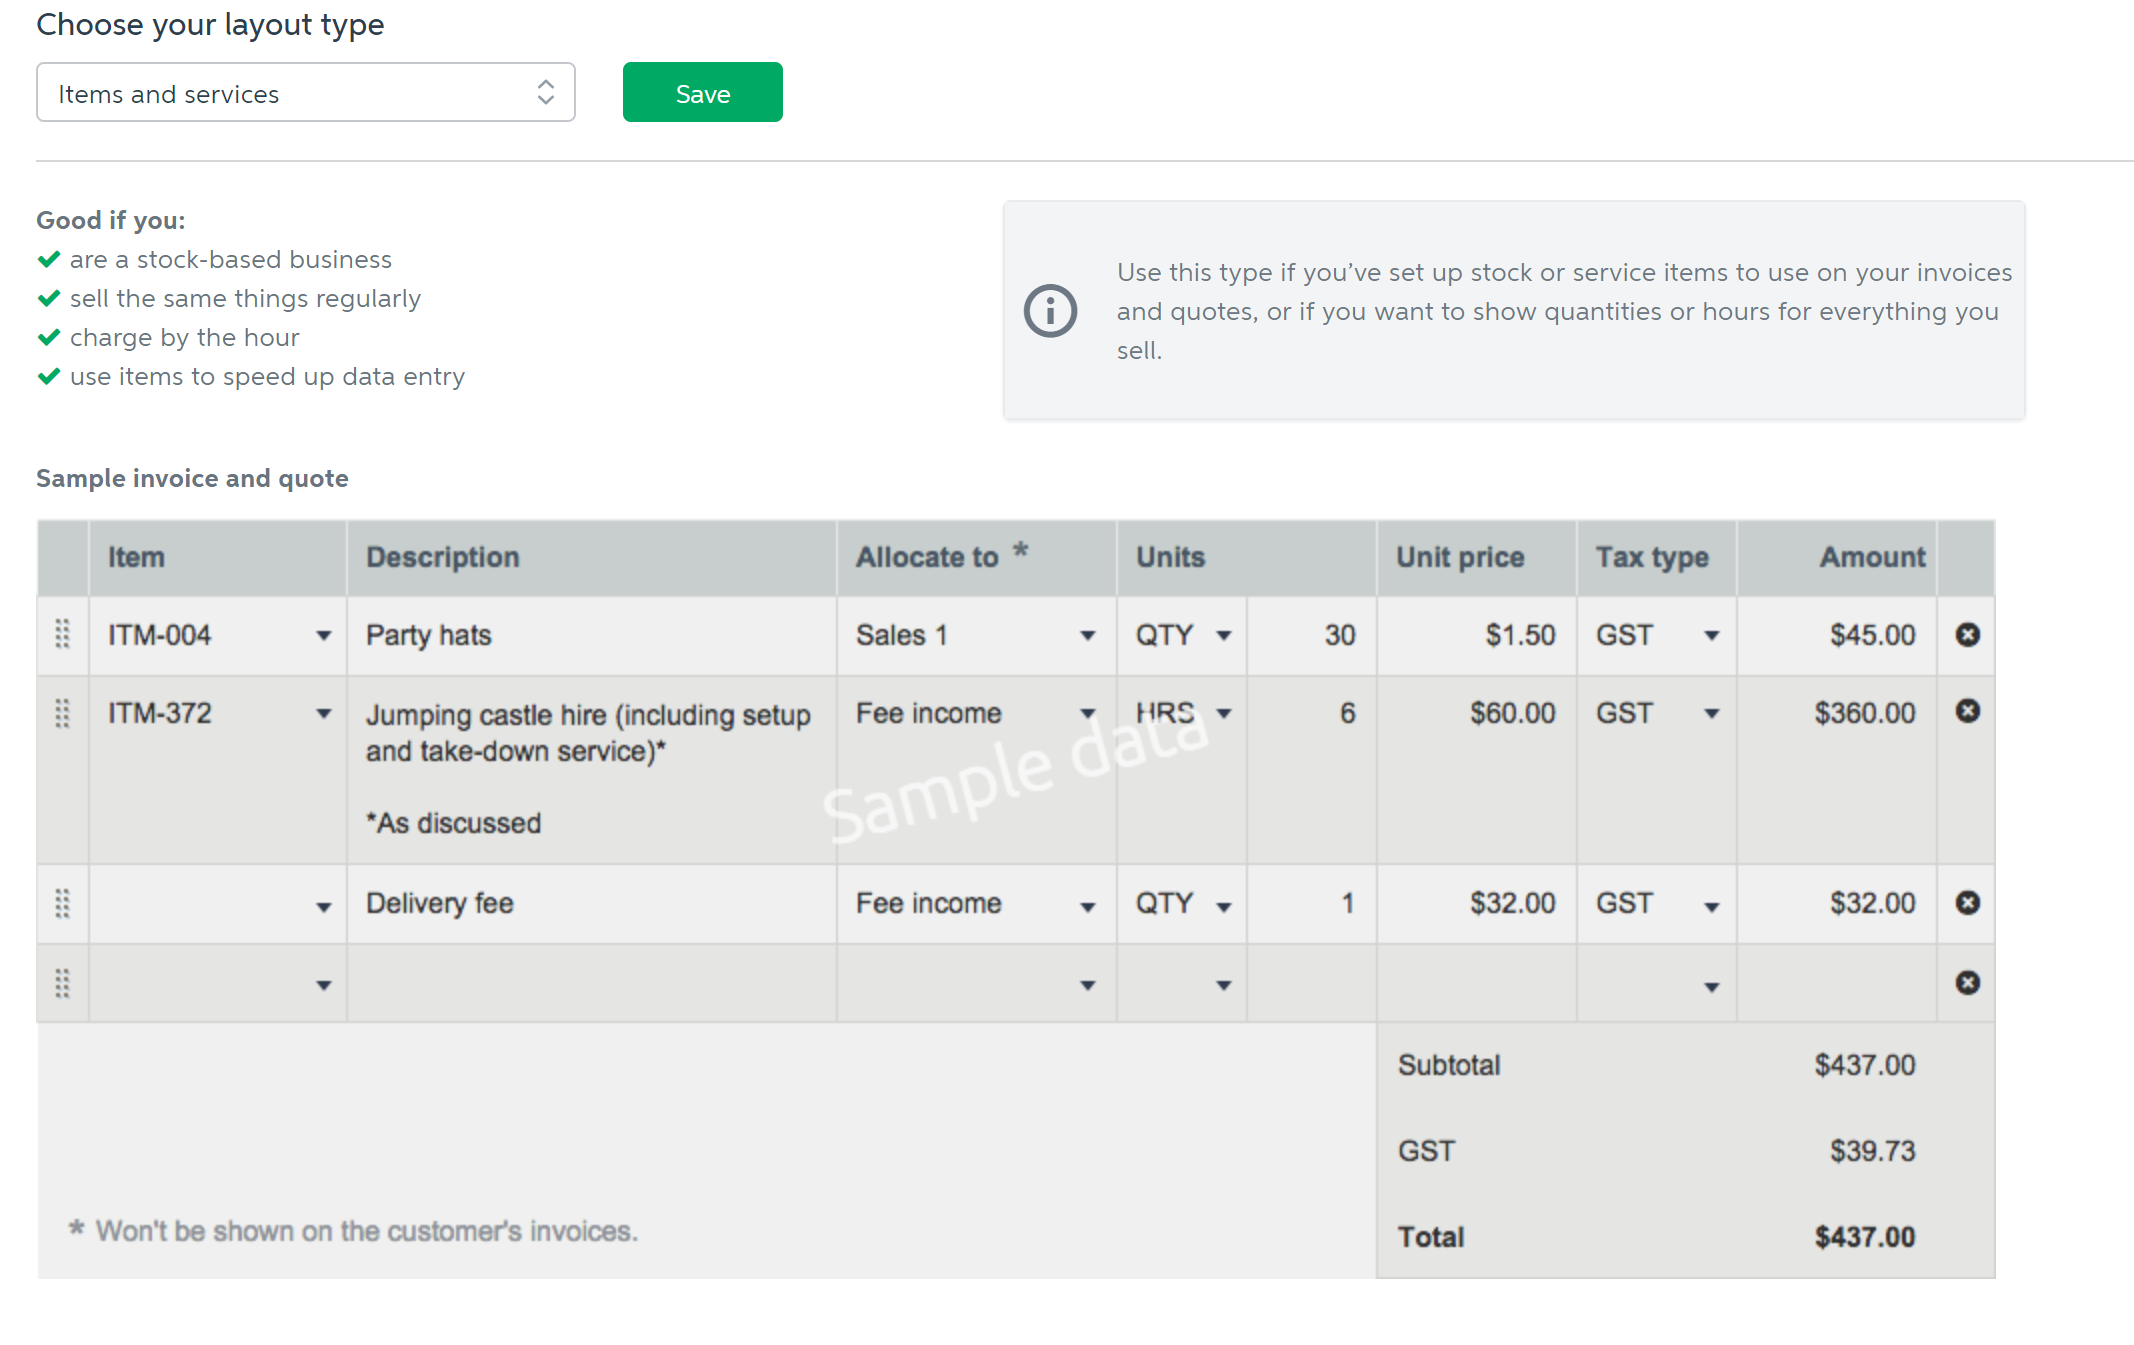
Step 1: Choose a layout type
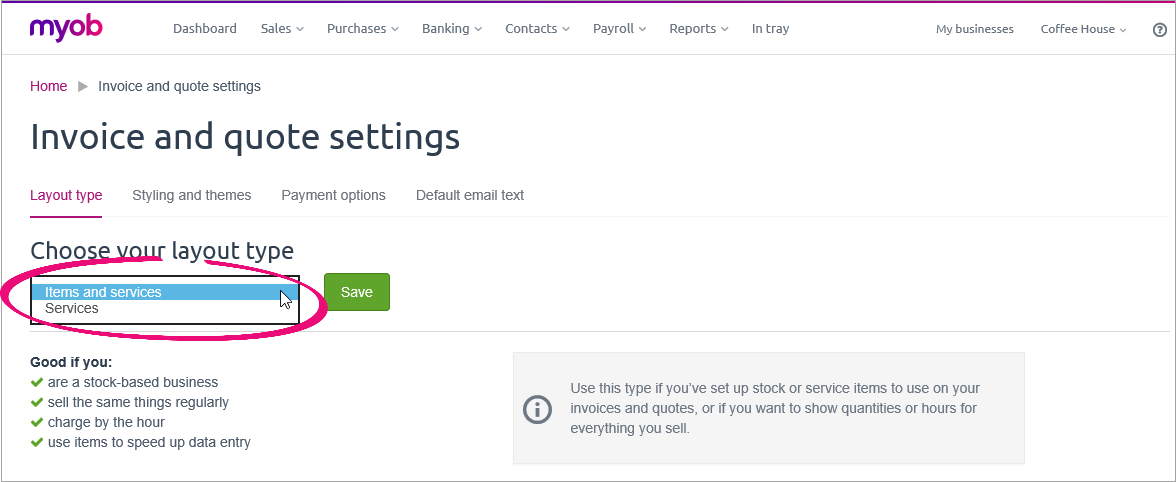
1. Depending on whether you include items or quantities on your invoices and quotes, you can choose a layout type that shows only the columns you actually use
a. Items and services – this allows you to enter quantities on each line of your invoices and quotes
b. Services – This allows you to enter a description on each line, and does not include columns for items or quantities. This gives a simple, clean look for date-based or professional services
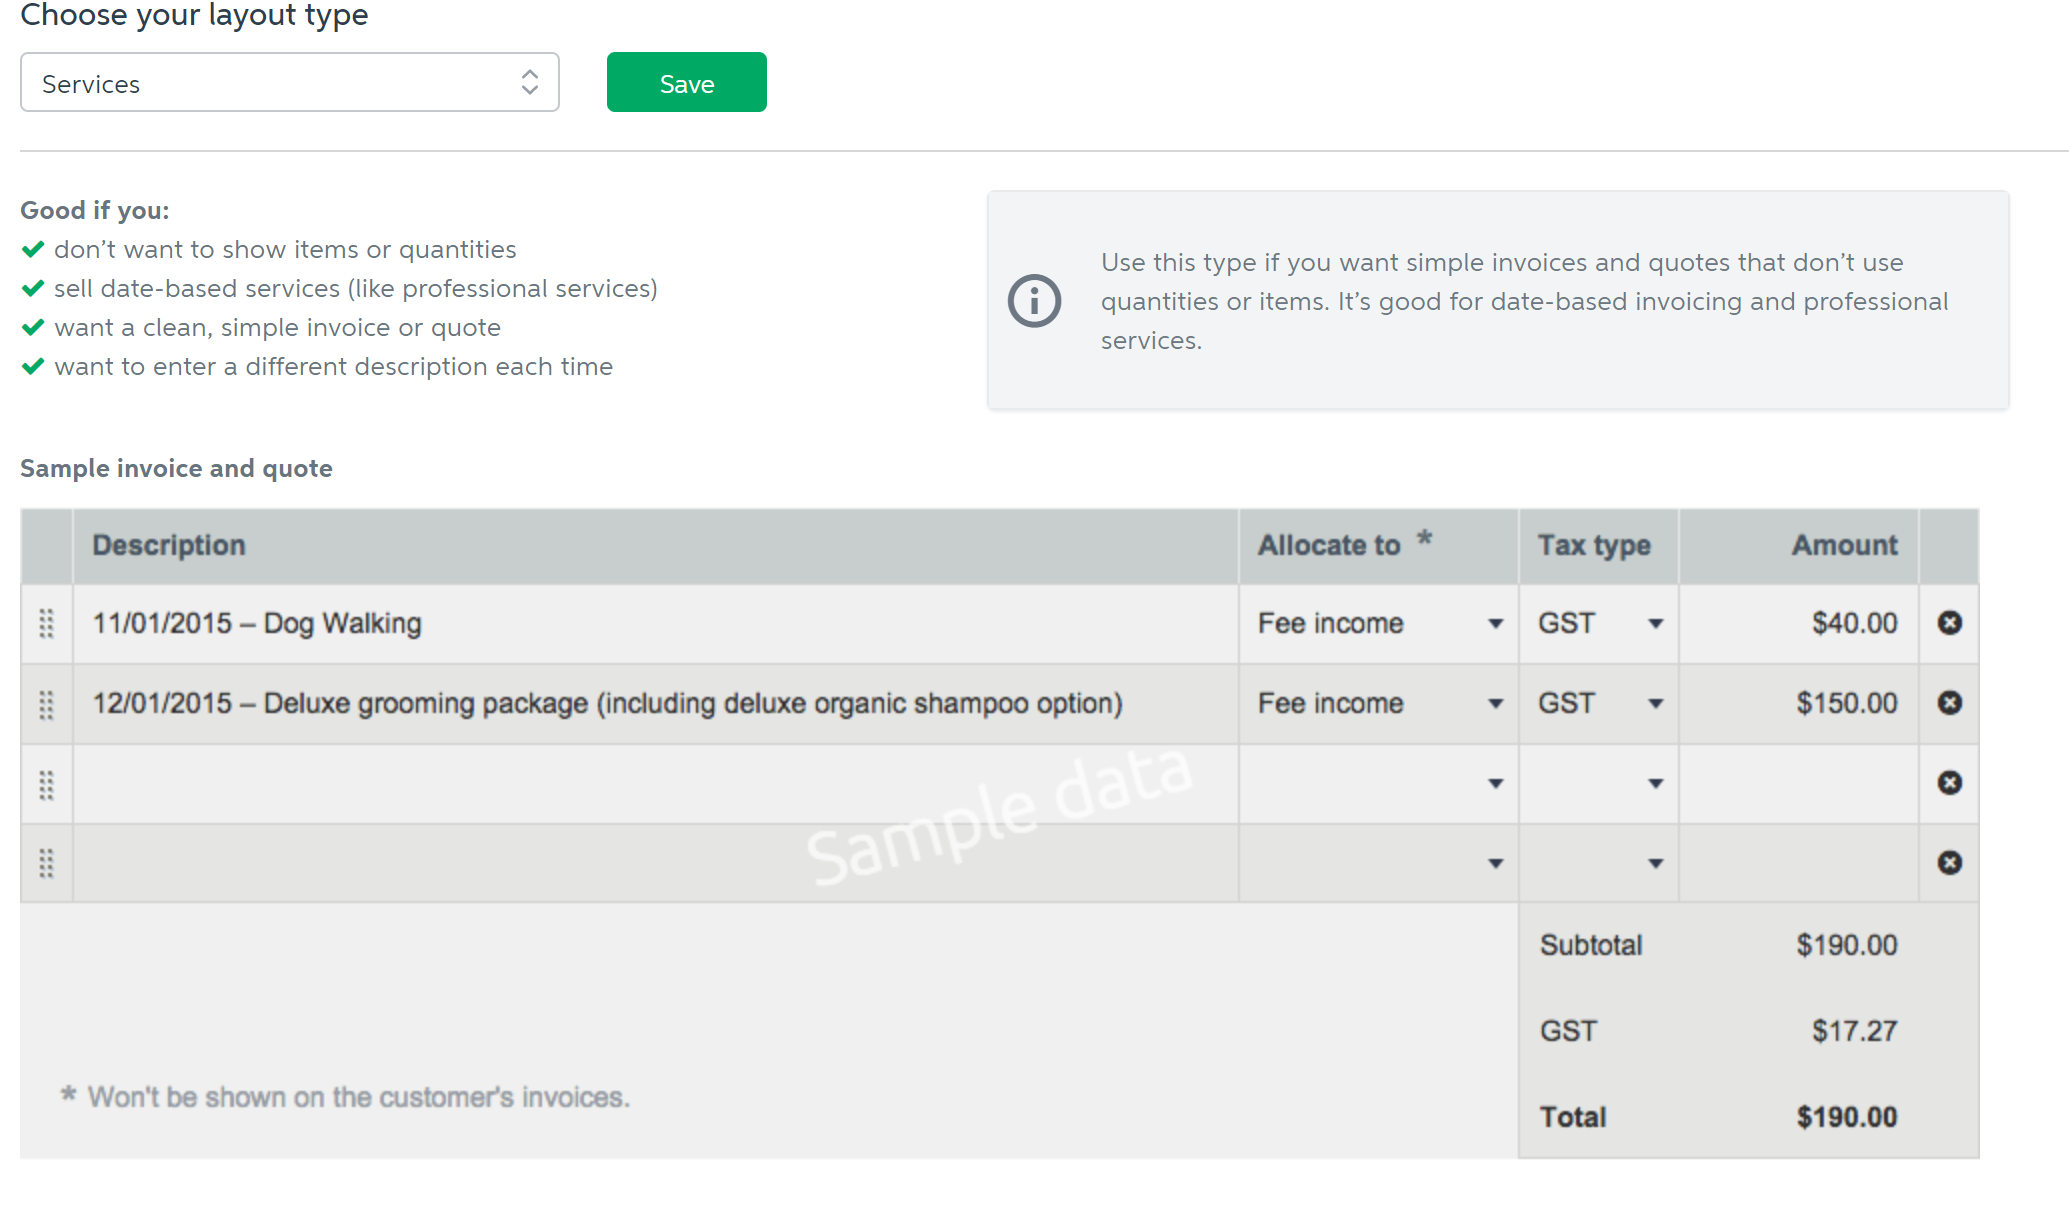
Geek Tip 2: Using the items and services layout option can be useful for speeding up invoice entry time. You can set up items that you use all of the time which pre-populates the description, account code and amount on the invoice. You still have the option to edit the pre-populated information if required.
Geek Tip 3: Make sure you click the green Save button as you work through the invoice setting options.
Step 2: Styling and themes
This is where you can customise the look of your invoices and quotes by adding a logo and choosing a theme and colours
1.Set up your header
This is where the logo you added earlier will appear, you can change the placement to be left or right aligned and change the size
2. Business details
Choose which business details you would like showing on your invoices using the check boxes
3. Theme options
The fun part, choosing your colour scheme and the design of your invoice
- Choose from the available themes from the drop-down list (a small preview appears to show your selection)
- In the Header colour field, click the coloured square to choose which colour to use for the graphical elements on your invoice style’s header
- In the Header text colour field, click the coloured square to choose a colour for the invoice or quote number and invoice type
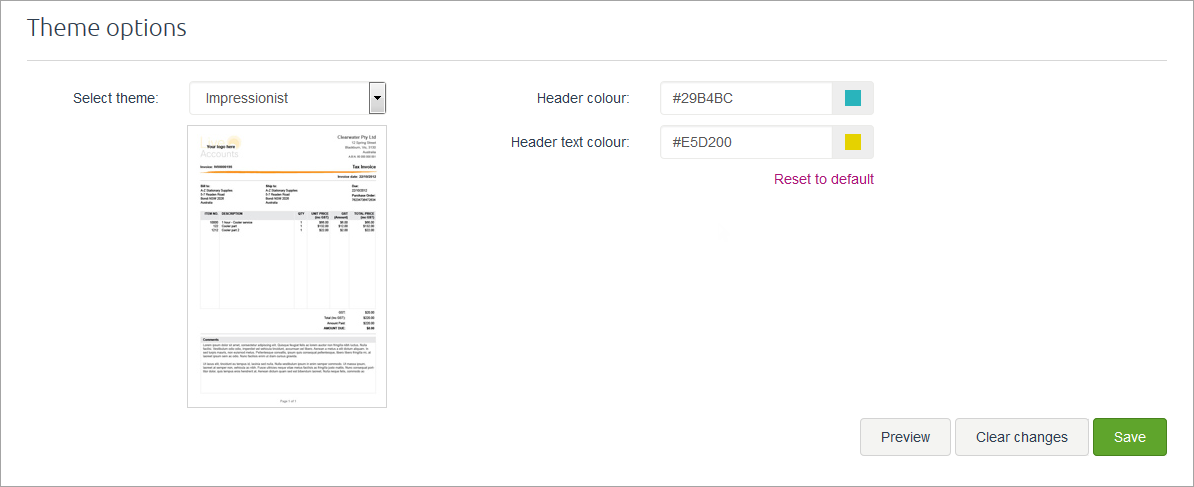
Geek Tip 4: If you know the hex codes for your header colours, you can type these in the text fields instead. For a professional touch, it can be good to use colours from your header image or logo.
Geek Tip 5: At any time, you can click on the Preview button to have sneak peek at what your custom invoice is going to look like.
Step 3: Payment options
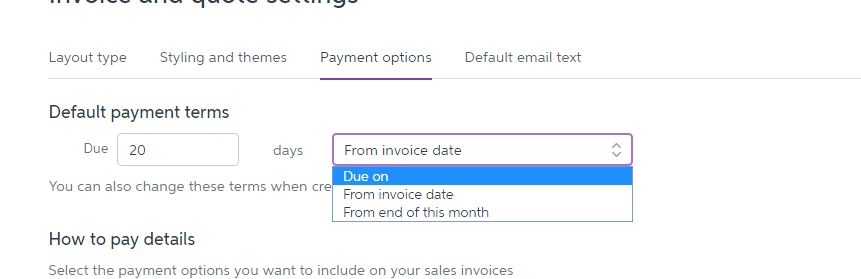
1. On the Payment options tab, you change choose how long your customers have to pay you, and enter the payment details that will appear at the bottom of your invoices, making it easy for them to pay
2. Default payment terms, you can choose from three ways of calculating payment terms:
a. Due on: Choose each invoice’s due date as you create the invoice
b. Days from end of this month: Invoices will be due he specified number of days from the end of the month they’re issued in
c. Days from invoice date: Invoices will be due the specified number of days after the invoices Date of issue
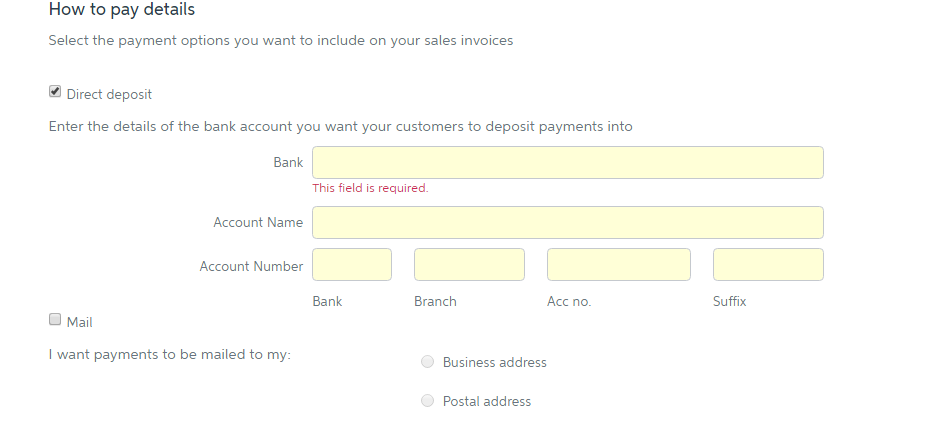
3. How to pay details: In the How to Pay section of the Payments options tab, you choose which options you want to include in the How to Pay section of the invoices you give to your customers. You can add details for Direct Deposit and Mail
a. Direct Deposit: Add the details of the bank account you want customers to deposit payments into
b. Mail: You can choose where you want customers to mail their payments to
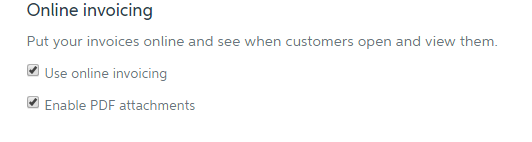
4. Online Invoicing: Choose if you’d like your invoices directly emailed out of MYOB Essentials by selecting Use online invoicing. You can also choose if you want to Enable PDF attachments to allow customers to download a PDF copy of their emailed invoice.
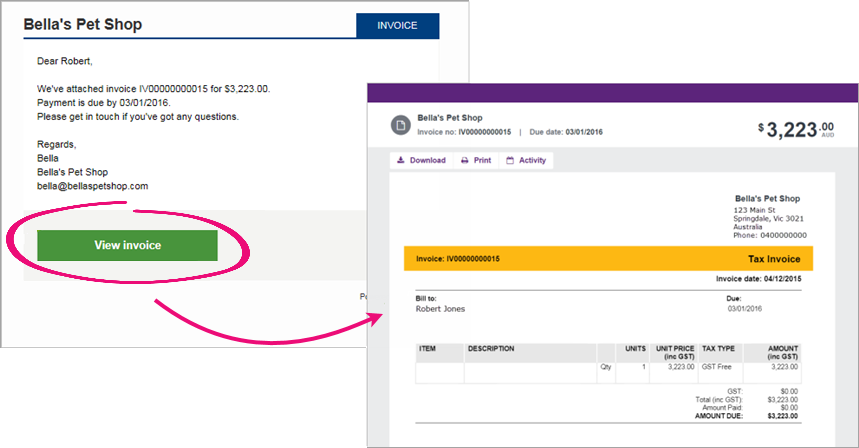
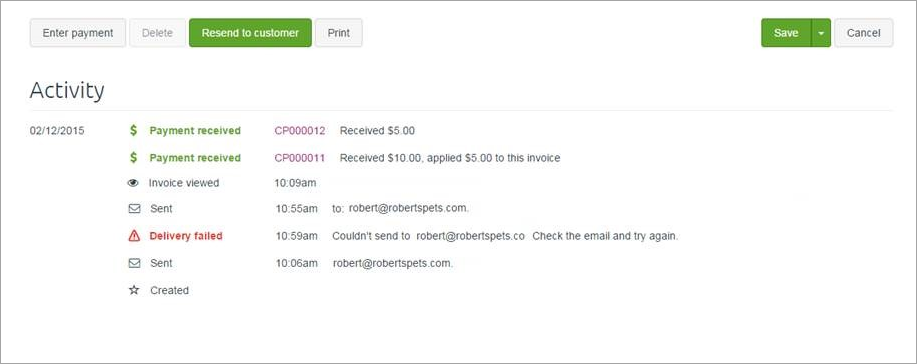
Geek Tip 6: Online invoicing is a fantastic feature. Using online invoicing gives you the ability to monitor the activity on the invoice that has been sent. When viewing the invoice, it will show you:
- When the invoice was sent
- The email address that the invoice was sent to
- The amount of times and date that the customer has opened the invoice
Step 6: Default email text
1. Here you can customise the default email text that’s sent with your invoices and quotes when you email them to your customers
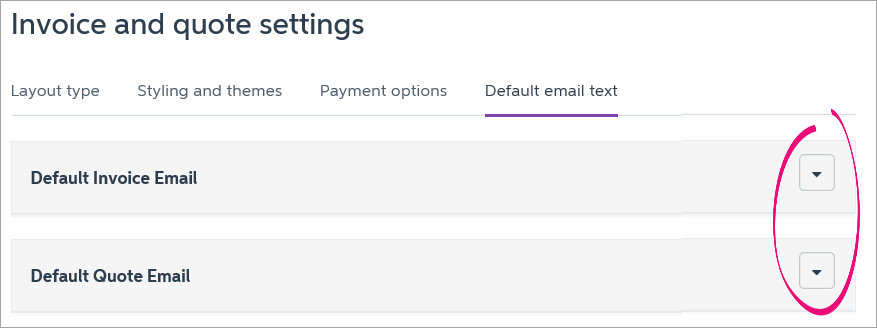
a. Default Invoice Email: Edit the text of the email, personalising it to your liking. You can use variables like the customer’s name, your business details, or information about the invoice or quote that you’re sending
b. Variables can be inserted by clicking your cursor in the body of the message where you want it to appear and then click the variable from the list on the right
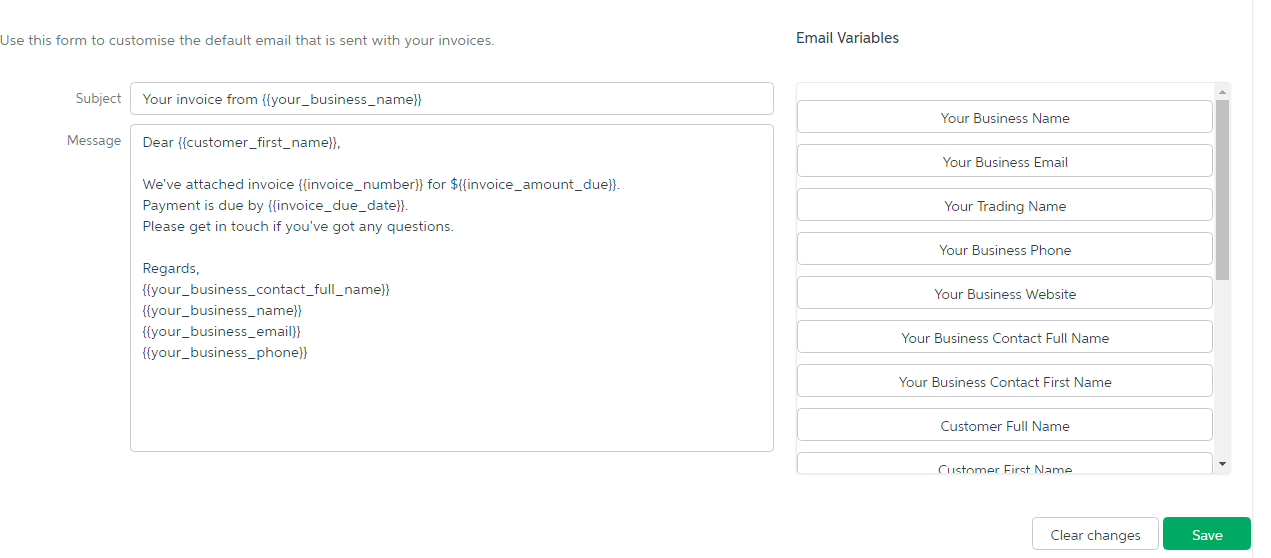
c. When you’re done, click Save
Geek Tip 7: If you make a mistake and want to revert to the previously saved version of the email, click Clear changes.
If you require any further assistance….
Please contact our in-house guru, Kate
http://www.bwr.co.nz/contact-us#itdept
06 873 8037